I felt bored and thought of having a look at this exe. These are my rough notes on this one.
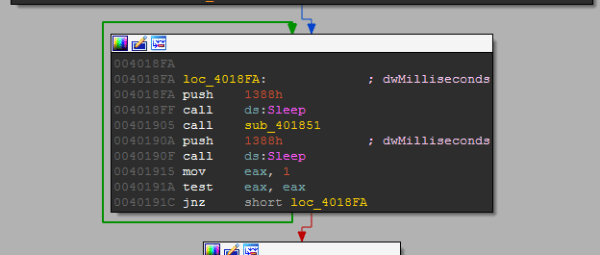
Every 5 seconds the function ‘401851’ is called.
Basically, this malware takes screenshots and encrypts them and stores them in the current directory starting with “temp%08x” % GetTickCount().

The content is encrypted using its custom algorithm.
I have renamed the function names with meaningful names. First the screenshot is taken and next it’s submitted to the encrypting function and next it’s written on disk.
This is how the “Take_Screenshot function looks like. Easily we can identify it takes a screenshot and returns a BMP image.
If we place a breakpoint in the “EncodingFunc” function we can see our BMP screenshot before encryption. The parameters passed are the memory location and the size of the image.
Let’s have a look at the encryption functions. Seems like the bitmap is undergone with several encryption functions which use XOR encryption.
Assuming this as a stream cipher which can be reversed, we can send the encrypted image data and it’s size and expect the decrypted image from the application. We can do this using the debugger on runtime by binary pasting the encrypted image data and size on the stack.
For example, in here I have decrypted the image using the debugger.
We can write a simple Python script using Immlib to automate this.
[code language=”python”]
#!/usr/bin/env python
import immlib
def main(args):
File = open("temp000e7498",’rb’)
buffer = File.read()
size = len(buffer)
imm = immlib.Debugger()
imm.setBreakpoint(0x00401875)
imm.run()
buf = imm.remoteVirtualAlloc(size)
imm.writeMemory(buf,buffer)
regs = imm.getRegs()
imm.writeLong(regs[‘EBP’]-12, buf)
imm.writeLong(regs[‘EBP’]-8, size)
imm.setBreakpoint(0x0040190A)
imm.run()
[/code]
After running the script we should see our encrypted image decrypted nicely. Rename it as .bmp.
Here’s the screenshot.


